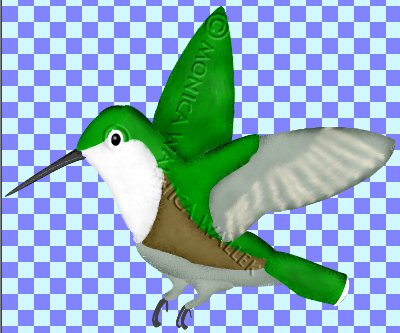
Ruby Throated Hummingbird Female PSP 7-8
This is a very common hummingbird in my area and most of the USA. Length is roughly 3 3/4 inches, but that is probably the female size, since she needs more mass to lay eggs and raise the young. They use nectar as an energy source to hunt bugs. Depending on where you are in the state, you might see these little birds years round.

Sources
You will need my supplies folder, which includes a sample of colors I used, and the canvas itself. When you open the canvas, immediately do a "Save As" and rename the canvas to work on a copy just in case a disaster happens to the original. Supplies are available here. For PSP7 users: Lighten/Darken options are under the retouch tool which looks like a hand. The smudge tool is also an option of the Retouch tool.
Why you won't see any specific Lighten/darken settings.
The more you repeatedly go over an area with either brush, the darker it gets with darkening and lighter it gets with lightening. If we pretend I give you the exact settings I used, you still won't get the exact same results I got *that* particular time. I get very different results with the same settings on the same day. I suspect those of you uncomfortable with this tool and other similar tools do not trust your own eyes. You will need to trust your own artistic judgement. Once I learned to do that myself, my own retouch tool group work improved to my own eyes. I will give you rough settings: hardness and density less than 50.

You will need to open the canvas file and the color swatch file in whichever version of PSP you will be using.
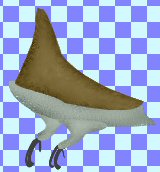
- Selections->Load from Alpha Channel 01 back foot black. Fill with the "black" color. Optional: Use darken tool around edges and lighten tool in center. Selections->select none.

- Selections->Load from Alpha Channel 02 back thigh lightest green. Fill with the lightest green color. Use darken tool around edges and lighten tool in center. Selections->select none.
- Selections->Load from Alpha Channel 03 belly lightest green. Fill with the lightest green color. Use darken tool around edges and lighten tool in center. Selections->select none.
- Selections->Load from Alpha Channel 04 flank brown. Fill with the brown color. Use darken tool around edges and lighten tool in center. Selections->select none.
- Selections->Load from Alpha Channel 05 front foot black. Fill with the "black" color. Optional: Use darken tool around edges and lighten tool in center. Selections->select none.
- Selections->Load from Alpha Channel 06 front thigh lightest green. Fill with the lightest green color. Use darken tool around edges and lighten tool in center. Selections->select none.
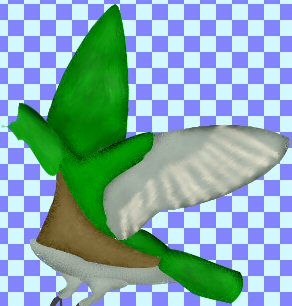
- Selections->Load from Alpha Channel 07 tail dark green. Fill with the dark green color. Use darken tool around edges and lighten tool in center. Selections->select none.

- Selections->Load from Alpha Channel 08 wing1 lightest green color. Fill with the lightest green color color. Use darken tool around edges and lighten tool in center. Selections->select none.
- Selections->Load from Alpha Channel 09 wing2 darkest green. Fill with the darkest green color. Use darken tool around edges and lighten tool in center. Selections->select none.
- Selections->Load from Alpha Channel 10 highlights cream. Fill with the cream color. Use darken tool around edges and lighten tool in center. Selections->select none.
- Selections->Load from Alpha Channel 11 neck darkest green. Fill with the darkest green color. Use darken tool around edges and lighten tool in center. Selections->select none.
- Selections->Load from Alpha Channel 12 bill black. Fill with the "black" color. Use darken tool around edges and lighten tool in center. Selections->select none.

- Selections->Load from Alpha Channel 13 breast white. Fill with the white color. Use darken tool around edges and lighten tool in center. Selections->select none.
- Selections->Load from Alpha Channel 14 head darkest green. Fill with the darkest green color. Use darken tool around edges and lighten tool in center. Selections->select none.
- Selections->Load from Alpha Channel 15 markings white. Fill with the white color. Selections->select none.
- Smudge or soften any areas you feel need more blending.
- Click on the eye layer and reveal the eye.
- Merge visible your layers.
- Please be considerate and do not send images over 50K to the group! We all thank you.


PSP7 tool icons are from MaMaT's icon tubes.
"PSP" refers to
CorelTM Paint ShopTM Pro®.
The individual creators own the copyrights and/or trademarks on their respective software filters, fonts, presets, Quick Guides, scripts, magazines, and images/banners which are mentioned or appear on these pages.
Customizable layout provided by Blue Robot CSS layouts. Note that I changed the colors, background and customized the CSS for my site.
© Copyright 2001-2011, Monica Wallek, All rights reserved.
Using my tutorial, means you agreed to these usage terms. All page elements, tutorials, and explanatory and sample graphics belong to me except where otherwise noted.
