Masks and Frames

Here is a simpler version of creating masks and then using them to make a frame and saving the frame for PSP7 to use. Filters are not needed here and you can create endless looks on your frames by changing the 2 fills. I have noticed that portrait images need portrait frames and landscape images need landscape frames. Please keep in mind when framing....... you only need to make the mask once. Then you can keep reusing it.

Supplies:
Download this file and unzip it and make a note of the location of the files after you unzip them. The file contains:
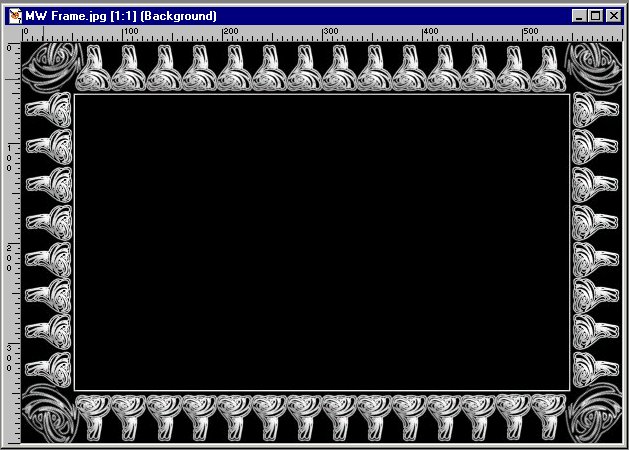
- MW Frame.jpg -- harmless .jpg format of what you will turn into a frame. (If you would like to learn how I made this file, you can try my Dingbat Mask Frame Tutorial.)
- MW Border.SEL- Thou shall not open this file. Scary messages happen if you do.
- MW portframe.jpg - portrait freebie image you can also convert into a mask and then frame. (If you would like to learn how I made this file, you can try my Dingbat Mask Frame Tutorial.)
- MW portborder.SEL- freebie to go with the portframe.jpg

- Open the MW frame.jpg file.
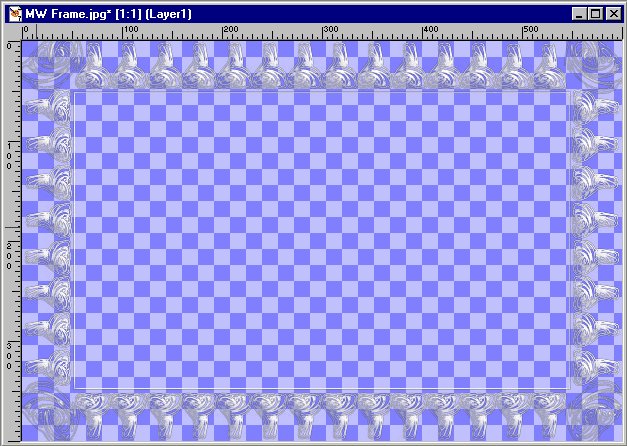
- Go to Masks->New->From image.

- Choose Masks->Save to disk.

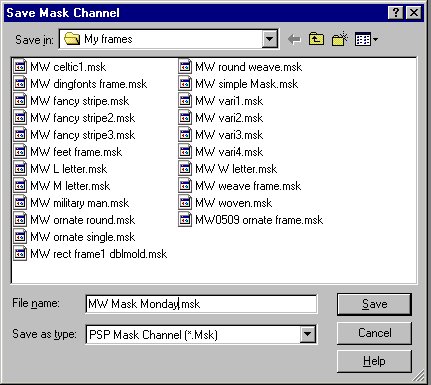
- Close MW Frame.jpg and DO NOT save changes. At this point you just created a mask and saved it!
On to using the mask and creating the frame:
- Open a new 600x400 16 million color, transparent image.
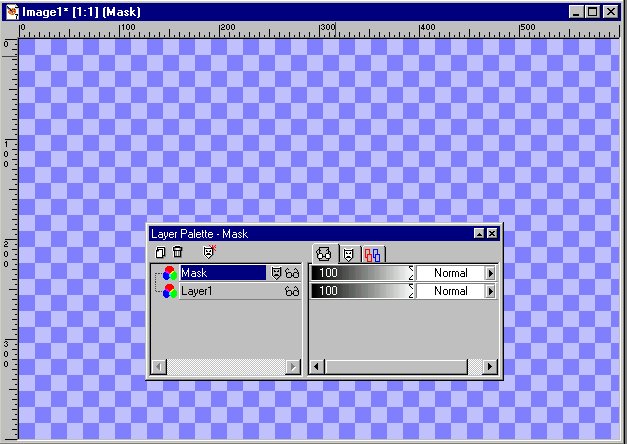
- Add a new layer named Mask.
- Go to Masks->Load From Disk. Pick the mask you just made in Step3. The only thing different you should now see is the little mask icon on your Mask layer in the Layer Palette. [Layer Palette!? What layer Palette!?. Go to VIEW->TOOLBARS-> check the layer palette option.]


- Click on the Flood Fill tool and then choose a pattern, gradient, or color and fill the mask by clicking on the image anywhere. You can now see the filled frame shape.


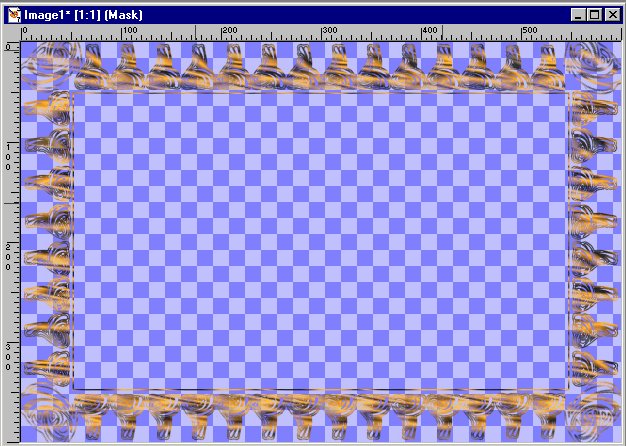
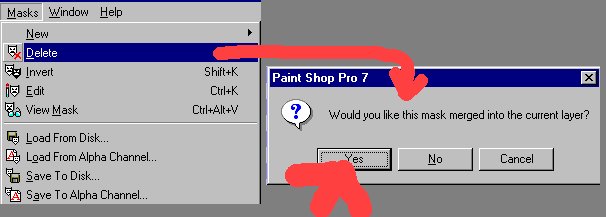
- Do you like the color choice? If not, Undo and do something else. This is the last chance to change this part. Now, go to Masks->Delete and answer yes. The little mask face is gone from the layer name now. It's okay, the stuff you filled is still there.
- Click on Layer 1. Add a new layer named Border.
- Go to SELECTIONS->Load From Disk. Go to where the supplies are for this lesson--wherever you put the folder. Click on the name: MW Border.SEL . (This is the *only* way to open these files.)
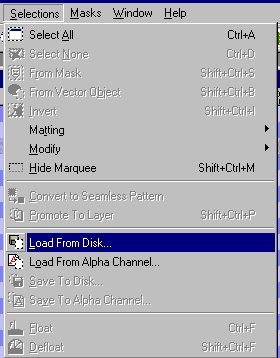
- Moving dotted lines otherwise known as marching ants just appeared. Let them march.
- Click on your fill tool again. Choose a nice contrasty color/pattern/gradient to go with what you filled in step 8. Fill the area between the marching ants. Do you like the color? If not, undo and refill with something different until you like it.
- Layers->Merge->Merge Visible layers.
- File->Save AS:
Type in a name meaningful to you here. Don't forget to change the ".psp" to ".pfr". Very important or frame option won't work later. You can either save this frame in your JASC Frames folder or somewhere else where you can remember it.
mondayframe.pfr
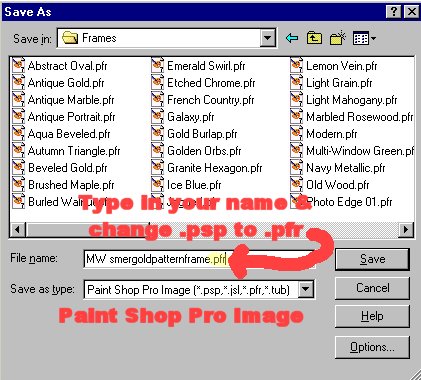
NOTE: You may NOT send the file you just created to the group. It is unviewable to the list members and is a huge memory hog. Continue to get a format you can send in.
- Close the image.
Using your new frame- so you can show the group.
- Go to IMAGE->Picture Frame.
- Find your frame in the scroll window. If you did NOT save your frame in the JASC Frame folder, click on the "EDIT PATH" button and then find your frame.
- Check "Frame Outside".
- Your image should now be framed by the frame you created earlier.

My Samples

For the experimenters and wanderers:
*In saving the mask, check the INVERT box. Watch what happens when you use the mask.
*When you fill in the mask layer and then the Border layer, play with solid colors, gradients, and patterns. Lovely things happen.


PSP7 tool icons are from MaMaT's icon tubes.
"PSP" refers to
CorelTM Paint ShopTM Pro®.
The individual creators own the copyrights and/or trademarks on their respective software filters, fonts, presets, Quick Guides, scripts, magazines, and images/banners which are mentioned or appear on these pages.
Customizable layout provided by Blue Robot CSS layouts. Note that I changed the colors, background and customized the CSS for my site.
© Copyright 2001-2011, Monica Wallek, All rights reserved.
Using my tutorial, means you agreed to these usage terms. All page elements, tutorials, and explanatory and sample graphics belong to me except where otherwise noted.
