
Monica's Cookies PSP6-7
Since this is another food lesson, you may want to be sure to eat before trying this one. You'll eliminate that hungry feeling many of you mention. :) This is another experiment I tried that became a lesson when several people asked where the lesson was. I'm giving two different methods to create my cookies. The first version uses selections from a brush with a BladePro preset. The second version uses an icing tube for a different look. I'm fairly sure this lesson can be done in both PSP6 and 7. Version 6 users will have different names and places for several tools.

Supplies
Click here to get my files. Does include a pattern for non BladePro users.
Download my special preset package offered with Martin's permission here. Martin's presets should be placed in the BladePro or Super BladePro Textures and Environments folder after unzipping them.
Please drop in and visit Martin's Planet Preset & BladePro Cafe for the rest of his amazing food presets. Thank you for creating these Martin.
I'm providing a tube, a brush, a cookie pattern fill, and 2 bonus icing fills. I have included the .psp file as well for the icing tube in case it is not compatible with PSP6. You will also need to view the saveatube.jpg file for the proper save settings during tube export.
If you'd rather make your own icing tubes, I wrote a lesson on doing it yourself.

Brush Cookies
- Open
 my MWcookiefill.jpg file if you do not have BladePro or Super BladePro. Minimize the image.
 - Open a new
 300 x 300 16.7 million color transparent image. (You'll want to tube these later.)
 - Choose my custom brush
 MW clipflake1.jbr in the custom brush options.
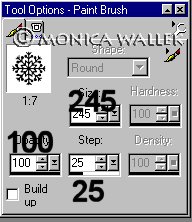
- Create the following new layers named Cookie, Icing, Details.
- Set your foreground color to white and apply the brush once on the Details layer. You can also choose a complimentary color at this point. Your choice. Click on the selection tool
 . Now select your image. To do this go to Selections -> Select All and then click anywhere on your cookie. It should now be selected.

- This is an optional step: on your Icing layer, expand your selection by 6. Flood fill
 with white or another color. Keep selected.
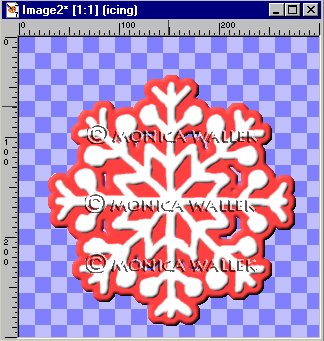
- On your Cookie layer, expand your selection by 10. Flood fill with white and apply BladePro granbar preset (most presets need white to work) or fill with my cookie pattern.

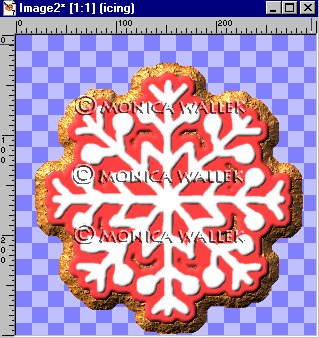
- Cookie pattern users will need to apply an inner bevel to their cookie layer.
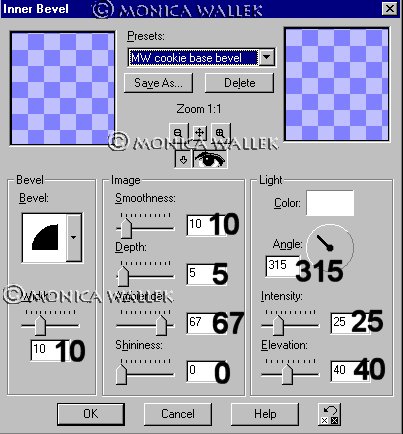
- I also applied another inner bevel to my Icing and Details layers.

- Resize--Remember to sharpen your image-- and Layers->Merge Visible. You are ready to tube them.
- Other ideas: Diana Todd and Marie Stevens have some wonderful animal and holiday mask images which would work for this purpose. The turkey and easter egg in the title image are both from Marie Stevens. The flower is a JASC preset shape, but you must remove the shadow before expanding your selection. I'm sure you can find Santas, angels, reindeer, trees, candy, pilgrims, shamrocks, bats, and even flags. You can use your preset shapes, ding fonts or whatever else you can think of.

Icing Tube Cookies
- 1. Open a new 300 x 300 16.7 million color transparent image. (You'll want to tube these later.)
- Add a new layer, Cookie.
- Choose my
 MW icingatom.tub in your tube options. (This tube makes icing when you hold down the left mouse button while moving the mouse around.)
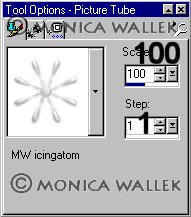
- Hold down your left mouse button while moving your mouse in a clockwise or counterclockwise spiral that ends in the center.

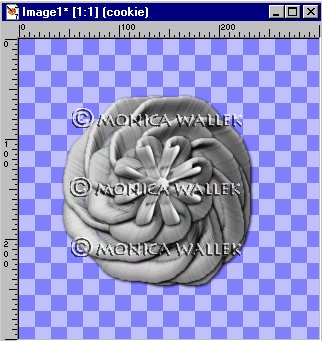
- You can tint your Cookie layer or just lighten it away from that dingy gray look. You won't need to add a bevel, since the icing tube already had one.
- Resize--Remember to sharpen your image-- and Layers->Merge Visible. You are ready to tube them.
Hey! Who ate the bottom left and top right corner cookies?!!!!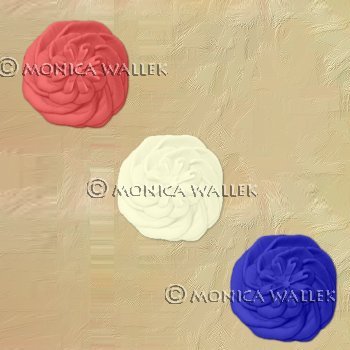

Samples
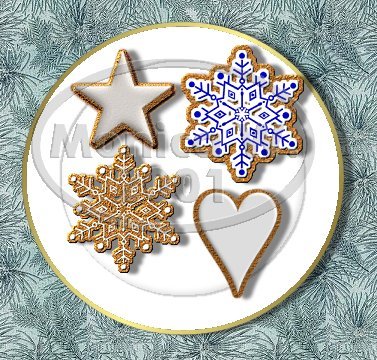
Background is from Jane Braz's site and snowflake is in a brush set from NIK. Star and heart are preset shapes from JASC. Plate is from Dizz's tutorial.


PSP7 tool icons are from MaMaT's icon tubes.
"PSP" refers to
CorelTM Paint ShopTM Pro®.
The individual creators own the copyrights and/or trademarks on their respective software filters, fonts, presets, Quick Guides, scripts, magazines, and images/banners which are mentioned or appear on these pages.
Customizable layout provided by Blue Robot CSS layouts. Note that I changed the colors, background and customized the CSS for my site.
© Copyright 2001-2011, Monica Wallek, All rights reserved.
Using my tutorial, means you agreed to these usage terms. All page elements, tutorials, and explanatory and sample graphics belong to me except where otherwise noted.
